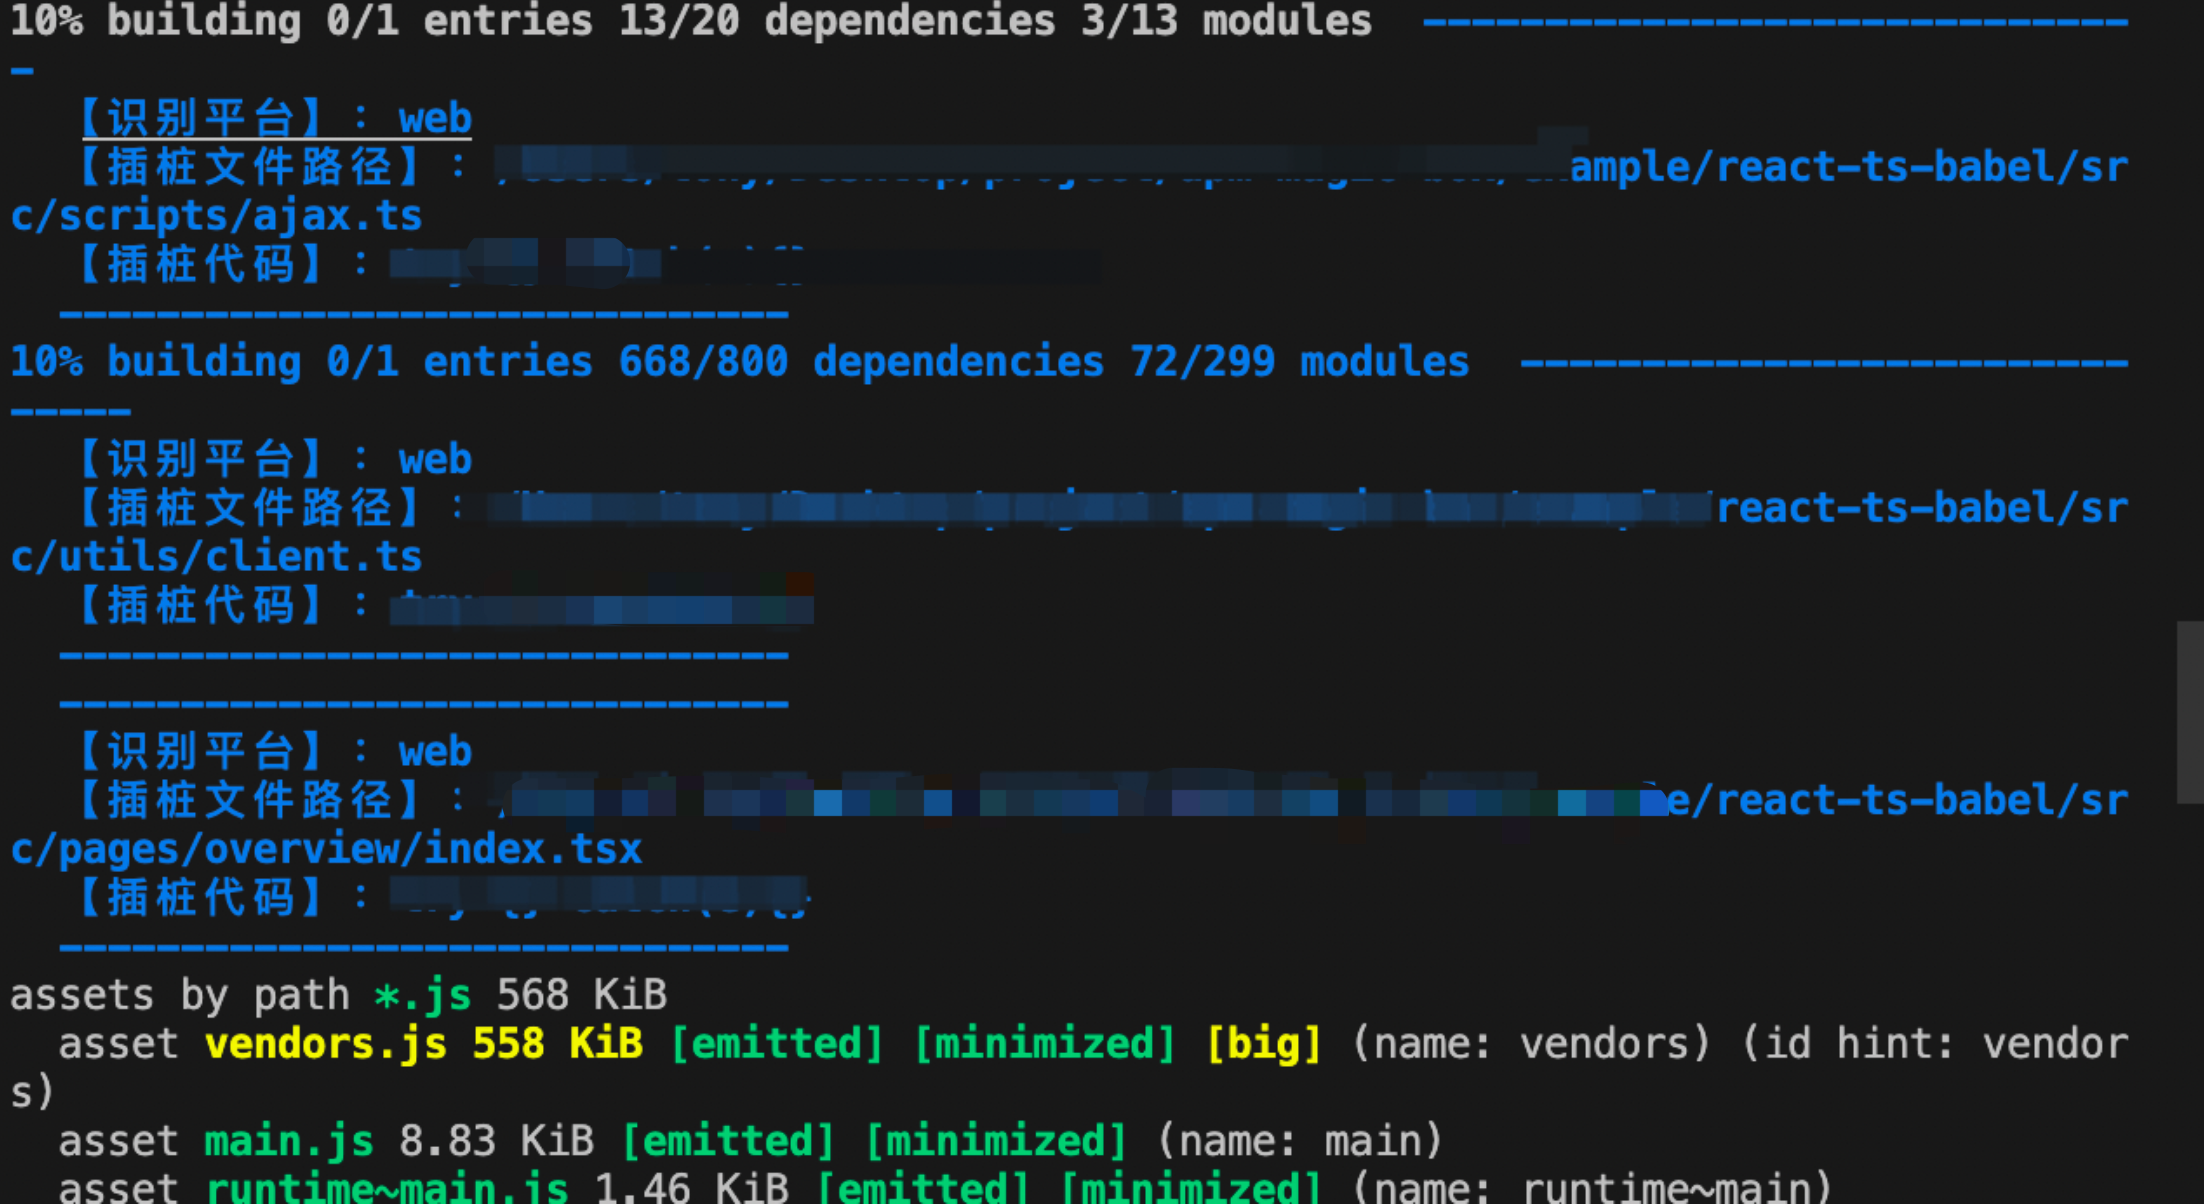
一、功能介绍
js是单线程的弱类型的脚本语言,所以很多错误会在运行的时候才会发现,一旦出现运行时的错误,那么整个js线程都会挂掉,导致我们页面没有响应,所以我们需要有一种兜底手段来避免,而主动对运行时可能会产生错误的表达式进行trycatch是最容易实现的一种方式,本文提供的工具是在此基础上通过构建自动化的方式,将Web或小程序SDK错误上报的API插入Catch表达式中,提供运行时收集异常堆栈的工具,是对目前APM WEB/小程序 SDK错误采集(onerror、unhandledrejection....)的一种补充。
二、快速上手
使用小贴士: 使用工具参与构建前一定要确保已集成了Quick Tracking WEB(v2.0.7及以上支持)或小程序(v1.0.4及以上)的SDK 插桩工具会将SDK 错误主动上报API作为函数表达式插入Catch表达式中,所以要确保运行时发生异常执行Catch回调之前已加载Quick Tracking SDK。(顺便说一句即使执行顺序颠倒,插桩的代码也做了逻辑兜底避免发生错误)
// babel
npm install -D @umengfe/babel-plugin-uapm-trycatch
// rollup
npm install -D @umengfe/rollup-plugin-uapm-trycatch
{
  presets: [
    '@babel/preset-env',
    '@babel/preset-react',
    '@babel/preset-typescript',
  ],
  plugins: [
    '@babel/plugin-transform-runtime',
+    [
+      @umengfe/babel-plugin-uapm-trycatch,
+      {
+        include: ['**/*.tsx', '**/*.ts'],
+        platform: 'wechat'
+      }
+    ]
  ],
};
const webpack = {
entry: resolve('src/main.tsx'),
module: {
rules: [
{
test: /\.jsx?|tsx?$/,
exclude: /node_modules/,
use: [
'babel-loader',
],
},
],
},
...
};"scripts":
"build": "webpack --progress --env=production --config ./build/webpack.prod.js --profile",
},
// npm run build
// 目标插桩示例
const Index = () => {
   try {
    throw new Error("发生错误")
  } catch (error) {
     // 插桩前
    console.log(error);
  }
  return (
    <Page>
      <GuidePage config={config} />
    </Page>
  );
};
三、入参说明
配置参数 | 是否必选 | 参数说明 | 参数类型 | 示例 |
include | 否 | 包含的文件及路径规则 | string[] | include: ['/*.tsx', '/*.ts'] |
exclude | 否 | 排除的文件及路径规则 | string[] | exclude: ['**/node_modules'] |
platform | 否 | 支持平台类型,支持(wechat、WEB/H5、alipay) | string | platform: 'web | alipay | wechat' |
目标构建平台也可配合构建命令通过约定的环境变量(UAPM_PLATFORM)在package.json的构建命令中进行指定,同时配置取值优先级配置参数高于环境变量
{
  "name": "",
  "version": "0.0.1",
  "scripts": {
    "build:web": "cross-env UAPM_PLATFORM=web npm run build",
    "build:wechat": "cross-env UAPM_PLATFORM=wechat npm run build"
    "build:alipay": "cross-env UAPM_PLATFORM=alipay npm run build"
  }
}
四、支持情况

五、原理解析
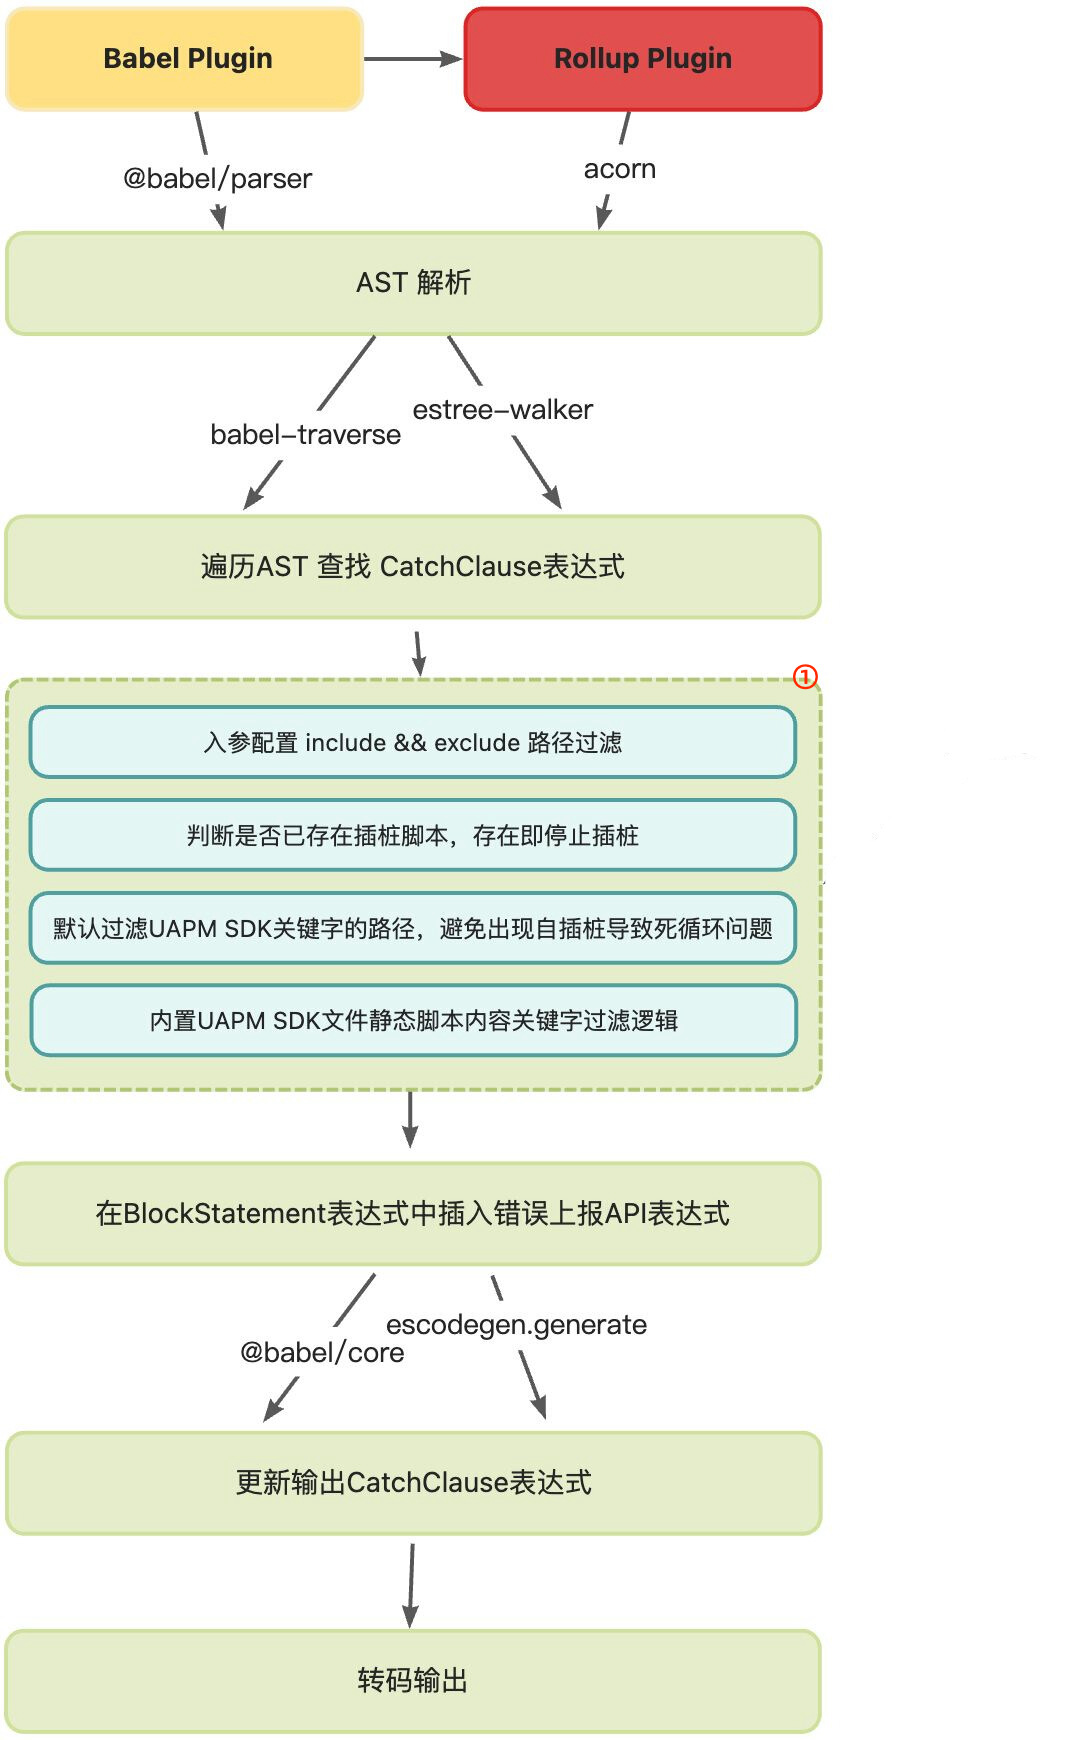
对静态代码添加代码需要遍历所有文件中代码的表达式类型,因此AST是一个最适合的选择。借助编译器工具(Babel、Rollup)解析AST语法树并参与构建,我们可以在遍历时指定某类表达式对其进行修改或者添加属性和表达式,从而实现最基本的代码插桩。进一步完善则需要考虑避免SDK自插桩导致的执行死循环、避免重复插装判断、插桩黑白名单文件或路径入参设计、考虑对市面上多类型的JavaScript编译器进行支持等。
下图中①为条件过滤

六、更多集成案例
6.1 Remax
1) 在终端执行命令安装必要的npm包。
npm install @umengfe/mini-apm -S
npm install babel-preset-remax -D
npm install @umengfe/babel-plugin-uapm-trycatch -D
2) 修改package.json中的命令,增加UAPM_PLATFORM=wecha。
"build": "cross-env UAPM_PLATFORM=wechat NODE_ENV=production remax build -t"3) 在app.js中集成APM Mini SDK。
const { init } = require('@umengfe/mini-apm');

init({
  appKey: 'xxxx',
  debug: true,
});
4) 在babel.config.js中加入插桩插件。
module.exports = {
    plugins: [
        ['@umengfe/babel-plugin-uapm-trycatch', {
            exclude: ['**/node_modules'],
            platform: 'wechat'
        }]
    ],
    presets: [
      [
        'remax',{},'babel-preset-remax'
      ],
    ],
};
5) 在src/pages/index/index.js新建错误进行测试。
// 在 src/pages/index/index.js 新建错误进行测试
const errorButton = () => {
	try {
    throw new Error('Remax框架插桩测试错误');
  } catch (e) {
    console.log(e);
  }
}

export default () => {
  return (
    <View className={styles.app}>
      <View className={styles.header}>
        <View className={styles.text}>
          <Button onClick={errorButton}>测试错误按钮</Button>
        </View>
      </View>
    </View>
  );
};
6.2 Taro3
1) 在终端执行命令安装必要的npm包。
npm install cross-env -D
npm install @umengfe/mini-apm -S
npm install @umengfe/babel-plugin-uapm-trycatch -D
2) 修改package.json中的命令,增加UAPM_PLATFORM=wechat、UAPM_PLATFORM=alipay。
"build": "cross-env UAPM_PLATFORM=wechat taro build --type weapp && cross-env UAPM_PLATFORM=alipay taro build --type alipay"3) 在app.ts中集成APM Mini SDK
import Taro from '@tarojs/taro';

if(Taro.ENV_TYPE.WEAPP) {
  const { init } = require('./utils/wx.cjs')

  init({
    appKey: 'xxxx',
    debug: true
  })
} else if (Taro.ENV_TYPE.ALIPAY) {
  const { init } = require('./utils/alipay.cjs')

  init({
    appKey: 'xxxx',
    debug: true
  })
}
4) 在babel.config.js中加入插件声明,并在plugins中添加插桩工具的引入
const plugins = []
plugins.push([
  '@umengfe/babel-plugin-uapm-trycatch',
  {
    exclude: ['**/node_modules'],
    platform: 'wechat'
  }
])
module.exports = {
  presets: [
    ['taro', {
      framework: 'react',
      ts: true
    }]
  ],
  plugins
}
5) 在index.tsx中进行测试
errorButton = () => {
    try {
      throw new Error(`平台:${Taro.getEnv()}, 错误信息:自定义错误, 版本:Taro3`)
    } catch (error) {
      console.log(error);
    }
  }

  render () {
    return (
      <div className='index'>
        <Button onClick={this.errorButton}>自定义错误按钮</Button>
      </div>
    )
  }
6.3 Uniapp
1) 在终端执行命令安装必要的npm包。
npm install @umengfe/mini-apm -S
npm install @umengfe/babel-plugin-uapm-trycatch -D
2) 修改package.json中的命令,根据不同的编译平台增加不同的编译参数UAPM_PLATFORM=web、UAPM_PLATFORM=wechat、UAPM_PLATFORM=alipay。
"build": "cross-env UAPM_PLATFORM=web npm run build:h5",
"build:mp-weixin": "cross-env UAPM_PLATFORM=wechat UNI_PLATFORM=mp-weixin NODE_ENV=production vue-cli-service uni-build",
"build:mp-alipay": "cross-env UAPM_PLATFORM=alipay UNI_PLATFORM=mp-alipay NODE_ENV=production vue-cli-service uni-build",
3) 在main.ts中集成APM Mini SDK
/* #ifdef MP-WEIXIN */
import { init } from './utils/wx.esm.js';

init({
    appKey: 'xxxx',
    debug: true
})
/* #endif */

/* #ifdef MP-ALIPAY */
import { init } from './utils/alipay.esm.js';

init({
    appKey: 'xxxx',
    debug: true
})
4) 在babel.config.js中加入插件声明,并在plugins中添加插桩工具的引入
plugins.push([
	'@umengfe/babel-plugin-uapm-trycatch',
	{
		exclude: ['**/node_modules'],
		platform: 'wechat || alipay || web'
	}
])
5) 在index.vue中进行测试
<template>
	<view class="content">
		<view>
      <button
				open-type=""
				hover-class="button-hover"
				@click="testButton"
			>
				自定义错误按钮
			</button>
    </view>
	</view>
</template>


methods: {
	testButton() {
		try {
			throw new Error(`"platform": ${process.env.UNI_PLATFORM}, "frame": "uni-app", "message": "This is test error"`)
		} catch (error) {
			console.error(error)
		}
	},
}
6.4 Vue3 + Vite
1) 在终端执行命令安装必要的npm包。
npm install @umengfe/apm -S // web sdk
npm install @umengfe/rollup-plugin-uapm-trycatch -D
2) 修改package.json中的命令,增加UAPM_PLATFORM=web。
"build": "cross-env UAPM_PLATFORM=web run-p type-check build-only"3) 在main.ts中集成APM Mini SDK
import { init } from '@umengfe/apm';
init({
    pid: 'xxxx',
    logLevel: 3,
    blankConfig: {
        blank_target: '',
        blank_timeout: 0,
        screenshot: undefined,
        X: 0,
        Y: 0
    },
    xhrConfig: {
        enableReqBody: true
    },
    fetchConfig: {
        enableReqBody: true
    }
})
4) 在vite.config.js中加入插件声明,并在plugins中添加插桩工具的引入
import tryCatchPlugin from '@umengfe/rollup-plugin-uapm-trycatch'

tryCatchPlugin({
      exclude: [
        'node_modules/**',
        'utils/**'
      ],
      include: [
        '*.js',
        '**/*.js',
        '*.ts',
        '**/*.ts',
        '*.vue',
        '**/*.vue'
      ]
})
5) 在index.vue中进行测试
function testButton() {
	try {
		throw new Error('vite test')
	} catch (error) {
		console.error(error)
	}
}

<template>
  <header>
    <img
      alt="Vue logo"
      class="logo"
      src="@/assets/logo.svg"
      width="125"
      height="125"
    />

    <button open-type="" hover-class="button-hover" @click="test">
      自定义事件
    </button>
  </header>

  <RouterView />
</template>
6.5 React + Webpack
1) 在终端执行命令安装必要的npm包。
npm install @umengfe/apm -S
npm install @umengfe/babel-plugin-uapm-trycatch -D
2) 修改package.json中的命令,增加UAPM_PLATFORM=web。
"build": "cross-env UAPM_PLATFORM=web npm run build"3) 在main.ts中集成APM Mini SDK
import { init } from '@umengfe/apm';
init({
    pid: 'xxxx',
    logLevel: 3,
    blankConfig: {
        blank_target: '',
        blank_timeout: 0,
        screenshot: undefined,
        X: 0,
        Y: 0
    },
    xhrConfig: {
        enableReqBody: true
    },
    fetchConfig: {
        enableReqBody: true
    }
})
4) 在.babelrc.js中加入插件声明,并在plugins中添加插桩工具的引入
const path = require('path');
module.exports = {
  presets: [
    '@babel/preset-env',
    '@babel/preset-typescript',

  ],
  plugins: [
    '@umengfe/babel-plugin-uapm-trycatch',
    [
      "uapm-trycatch",
      {
        include: ['**/*.tsx', '**/*.ts']
      }
    ]
  ],
};